mlflow[xethub] is a mlflow plugin integrating XetHub with MLflow so that you can use existing MLflow code to track experiments but store artifacts to XetHub.

Project description
MLflow-XetHub
This plugin integrates XetHub with MLflow so that you can use existing MLflow code to track experiments but store artifacts to XetHub.
Install plugin
Install from PyPI for the plugin's published version
pip install mlflow[xethub]
Or clone this repo and install locally for the latest code
git clone https://github.com/xetdata/MLflow-XetHub.git
cd MLflow-XetHub
pip install .
Authenticate with XetHub
If you haven't already, create an XetHub account.
The plugin uses PyXet to access XetHub, so you need to authenticate with XetHub in one of the following two ways.
Option 1: Log in with Xet CLI
xet login --email <email address associated with account> --user <user name> --password <personal access token>
Option 2: Export xet credentials as environment variables
export XET_USER_EMAIL = <email>
export XET_USER_NAME = <username>
export XET_USER_TOKEN = <personal_access_token>
Create a XetHub repo to store your artifacts
Go to https://xethub.com/ and create a new repo to store your MLflow artifacts.
Or log in with Xet CLI and xet repo make xet://<username>/<repo> --private / --public
Run your MLflow as is
Run MLflow server specifying XetHub repo to store artifact
No need to modify your MLflow code. The plugin will automatically detect MLflow runs and artifacts and store them in your XetHub repo once you start the MLflow server with:
mlflow server --backend-store-uri ./mlruns --artifacts-destination xet://<username>/<repo>/<branch> --default-artifact-root xet://<username>/<repo>/<branch>
which uses the mlruns directory on your machine as file store backend and XetHub as artifact store backend.
Run MLflow experiment
Experiments are logged in the directory where MLflow server is started, and the plugin and MLflow need to be running in the same python environment. So make sure to run your MLflow code and server in the same directory as well as having the plugin and MLflow installed under the same environment.
Using MLflow's quickstart as an example,
import mlflow
import os
import numpy as np
from mlflow import log_artifacts
from sklearn.model_selection import train_test_split
from sklearn.datasets import load_diabetes
from sklearn.ensemble import RandomForestRegressor

with mlflow.start_run():
    mlflow.autolog()
    db = load_diabetes()

    X_train, X_test, y_train, y_test = train_test_split(db.data, db.target)

    # Create and train models.
    rf = RandomForestRegressor(n_estimators=100, max_depth=6, max_features=3)
    rf.fit(X_train, y_train)

    # Use the model to make predictions on the test dataset.
    predictions = rf.predict(X_test)

    if not os.path.exists("outputs"):
        os.makedirs("outputs")

    with open("outputs/pred.txt", "w") as f:
        f.write(np.array2string(predictions))

    log_artifacts("outputs")
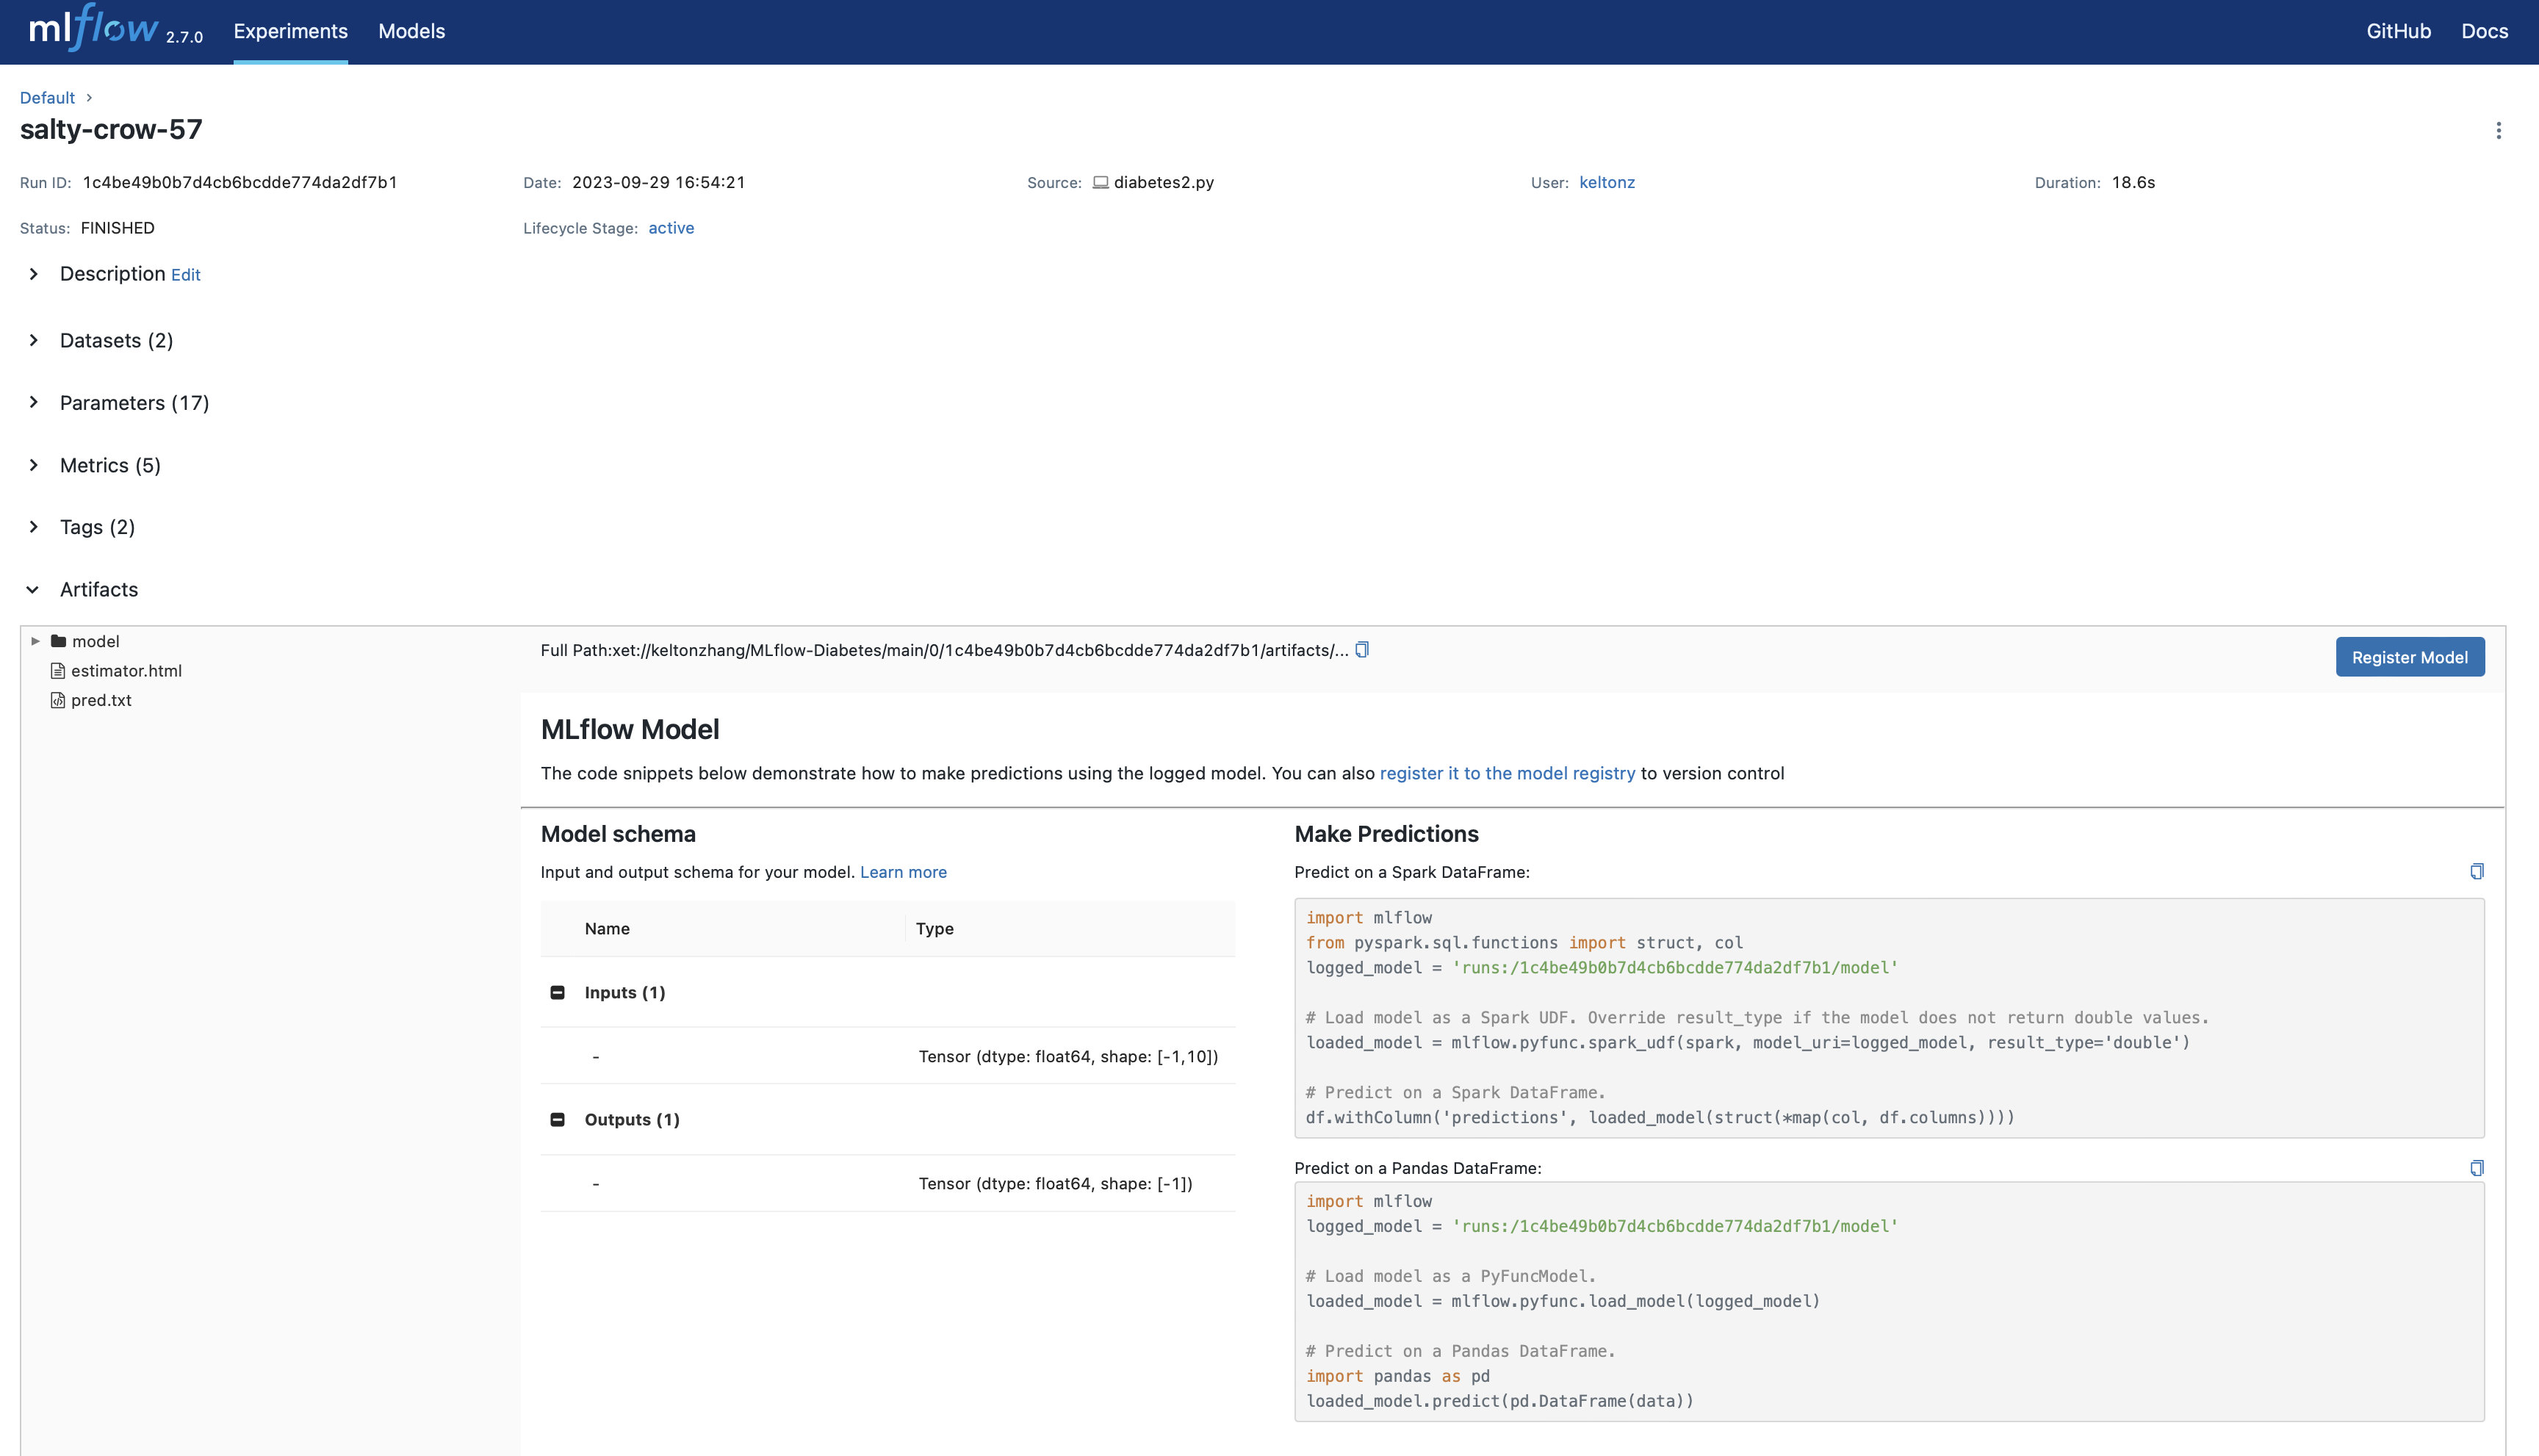
Store artifacts on XetHub and visualize in MLflow UI
The artifacts will be automatically stored on XetHub under the specified repo and branch.
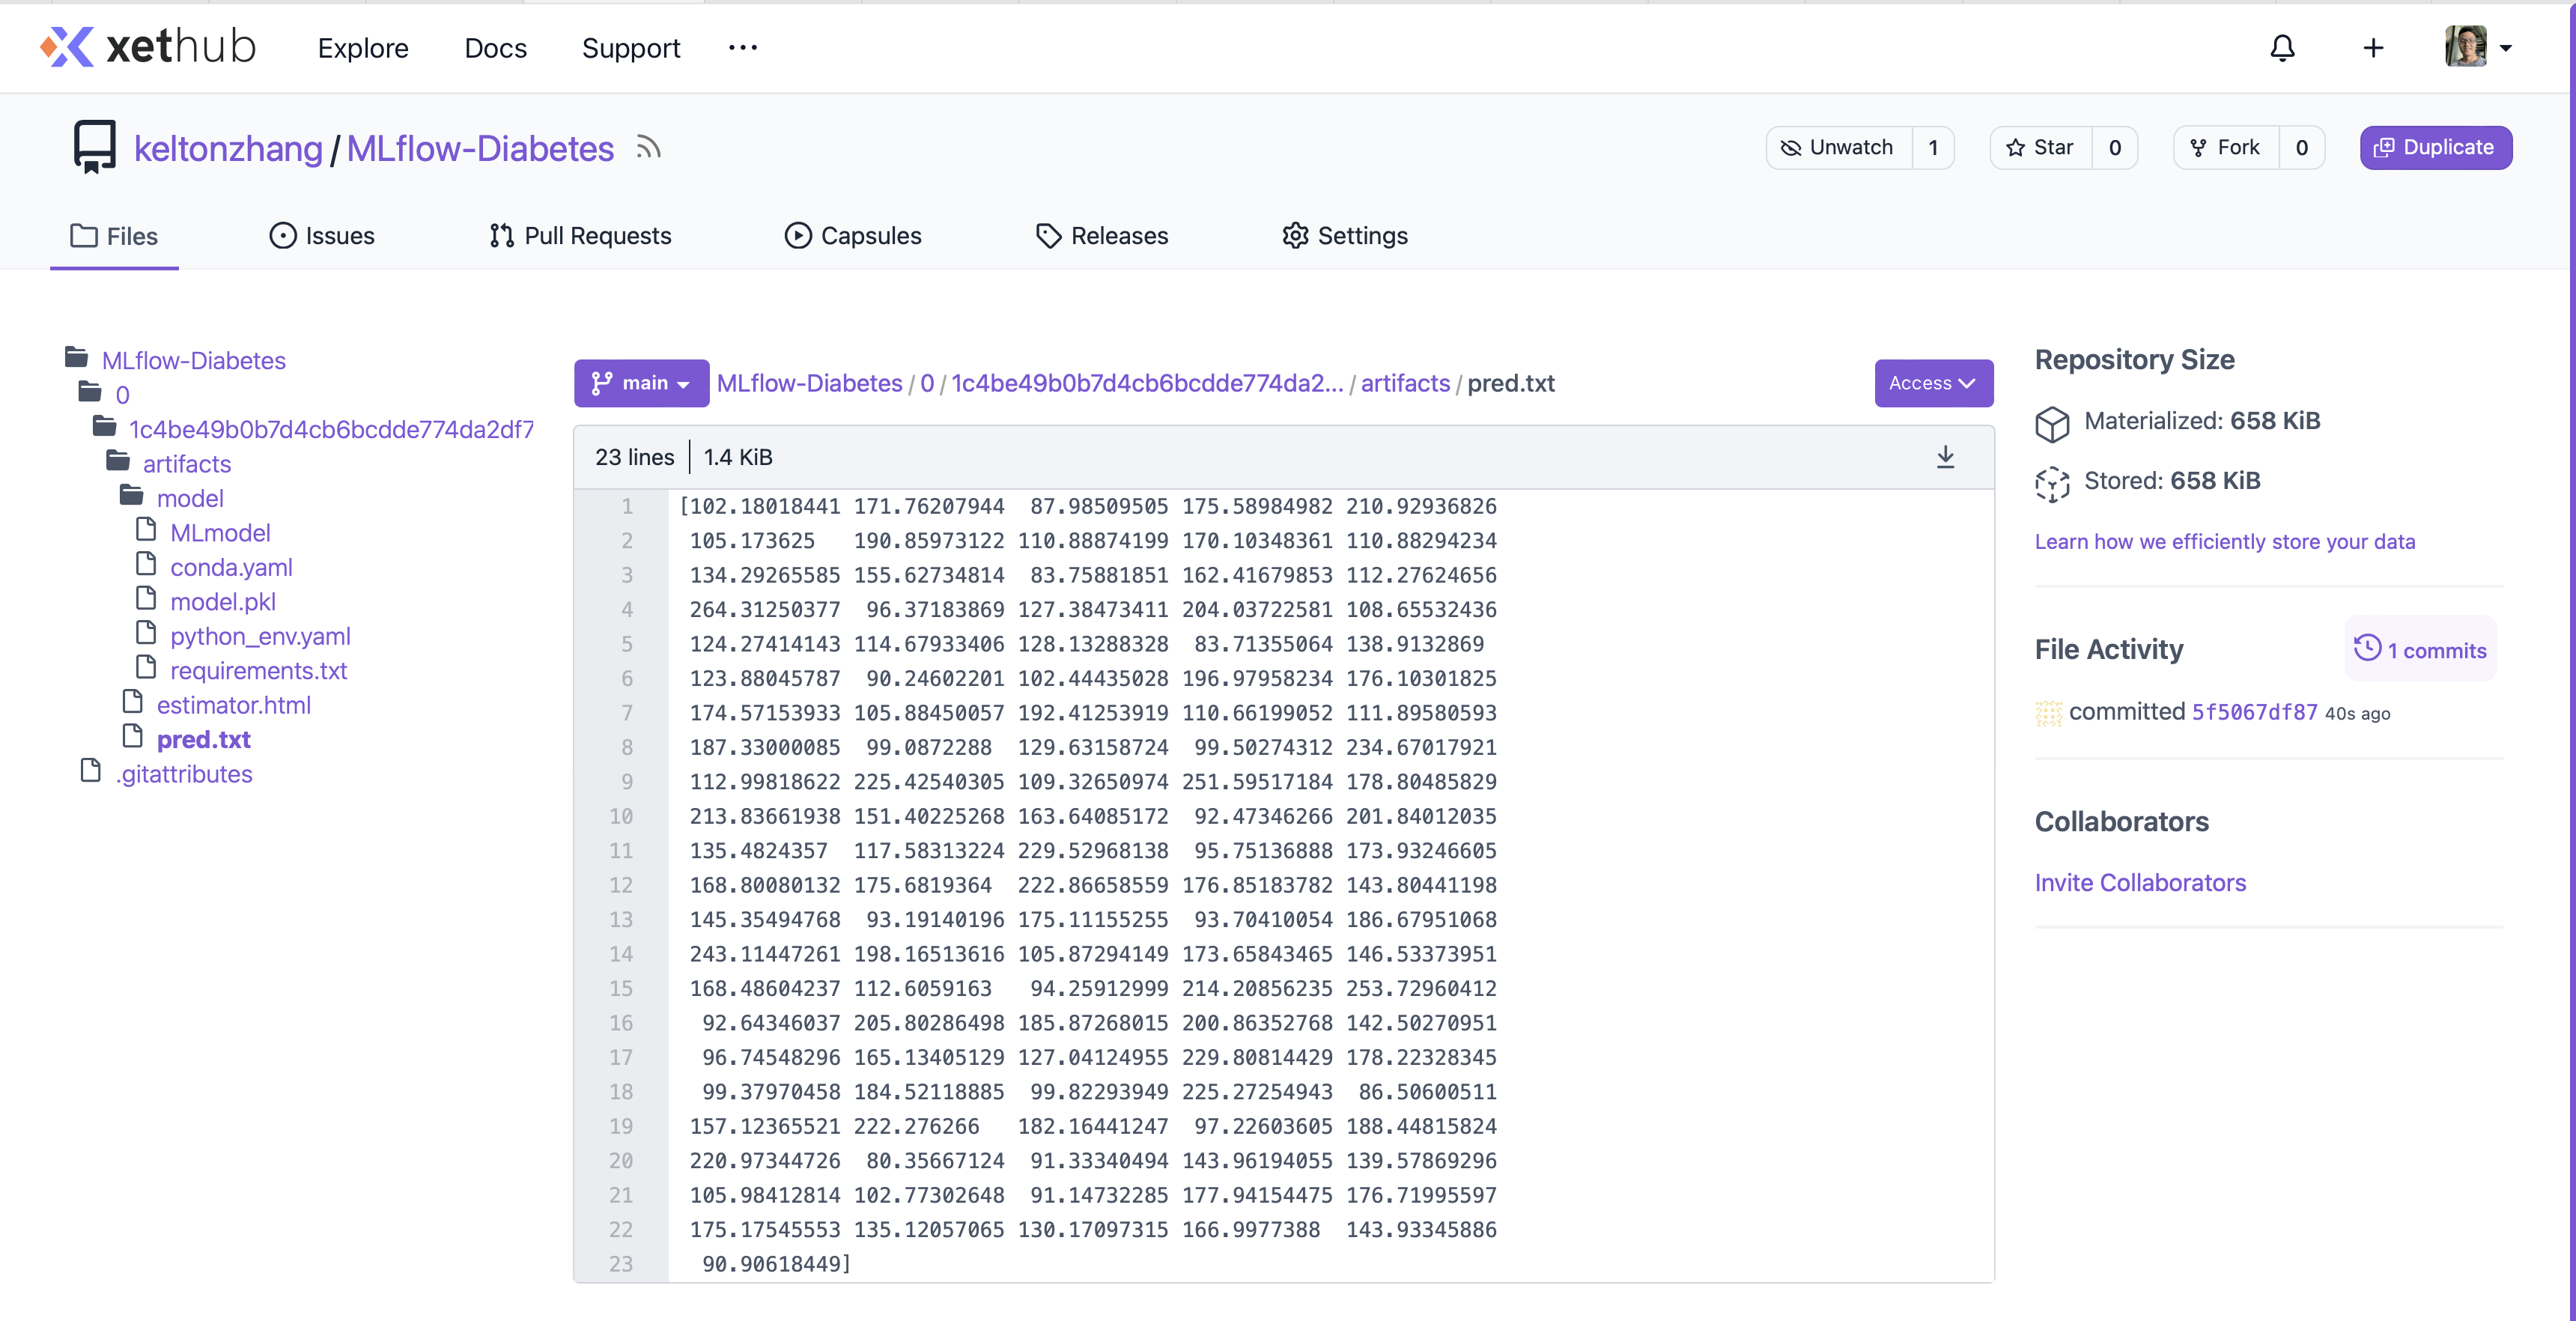
And the MLflow server will show the artifacts with UI on the default http://127.0.0.1:5000 or your own host.
Release history Release notifications | RSS feed

Download files
Download the file for your platform. If you're not sure which to choose, learn more about installing packages.
Source Distribution
Built Distribution
Hashes for mlflow_xethub-0.0.0-py3-none-any.whl
| Algorithm | Hash digest | |
|---|---|---|
| SHA256 | b2a503fbf865d5386ef0344877161948103b74922a52ea2f86ff1dd1707e14fe |
|
| MD5 | e19e13f75369160d937aec14cb1741bd |
|
| BLAKE2b-256 | 2820ea790e0add7a72b88fbfd5926efe9c6347bee4446c4e410d448efb555ef1 |


